
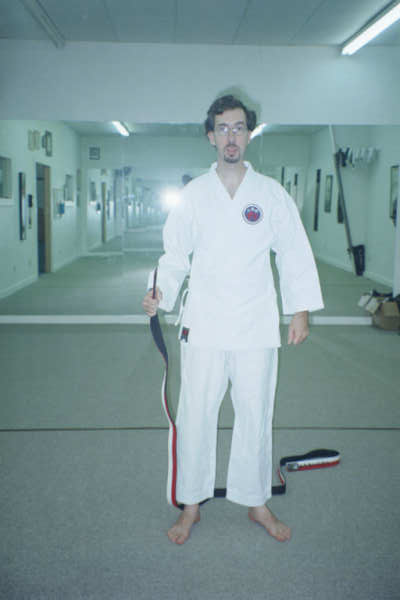
Obi is the Japanese term for your belt. Back in the days when dojo had earthen floors, students were issued one belt, at the beginning of their training. This was their white belt. They would wear this belt, without washing it, until it eventually became black. Even today, we do not wash our belts. The purpose of this is to recognize the “blood, sweat, and tears” that go into earning each belt.
Learning to tie one’s obi can be something of a challenge. Learning to tie one’s child’s obi, even more so. On this page, we will go through the steps to tie one’s belt. Please note that there may be different methods to make this same knot, and that different dojo may use different methods – or even different knots! The method here is the one taught at Rising Sun Martial Arts.
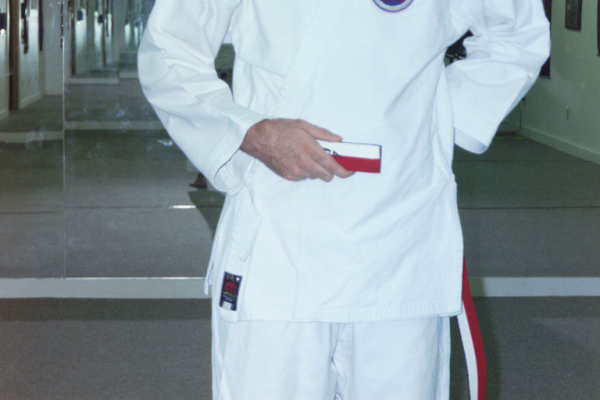
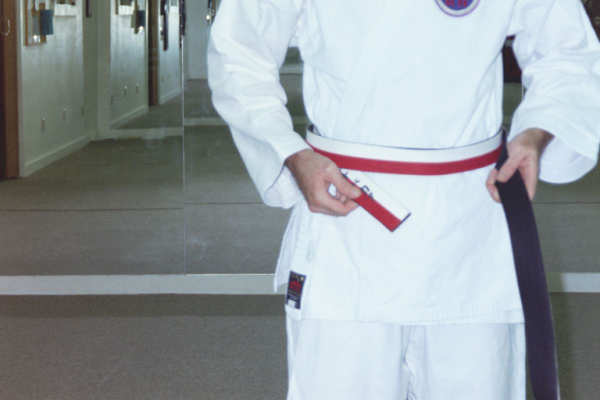
Step 1 – Take one end of your belt in your right hand and put the rest behind you.
Tip for Parents and Sempai’s: When trying to help a child learn to tie their belt, stand behind them and look down over them. This will give you the same perspective as if you were putting the belt on yourself.
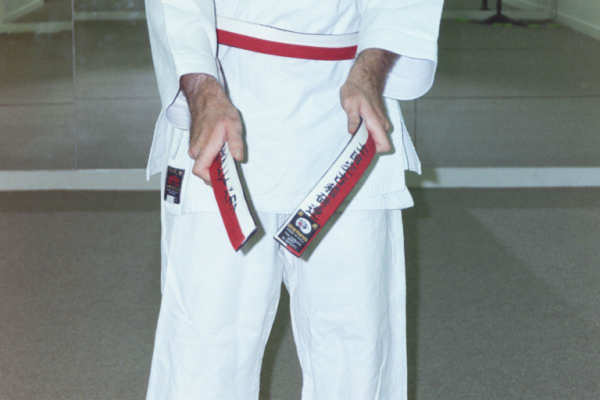
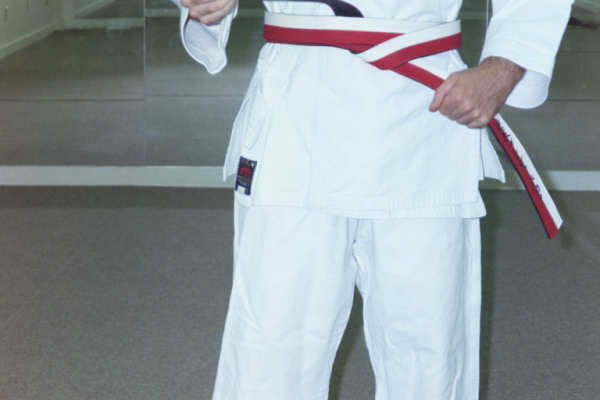
Step 2 – Place the end of your belt on your stomach, and wrap the long end around you twice…
Step 3 – Slide the short end down, and then even up the ends.
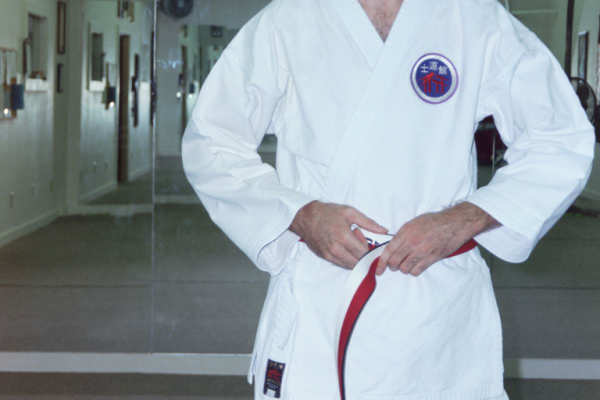
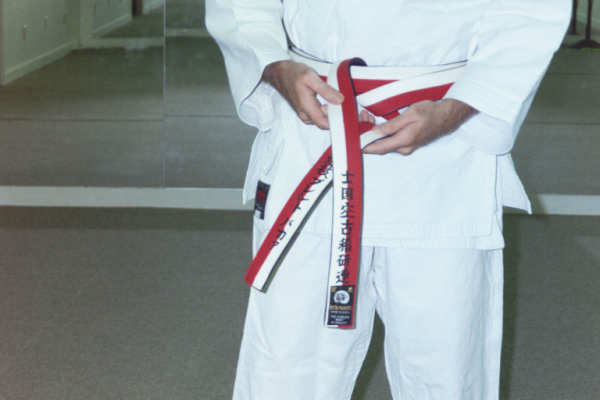
Step 4 – Tuck the right side back underneath – at least as far as the center of your stomach. Then bring the left side across the front, and tuck it up behind the two layers.
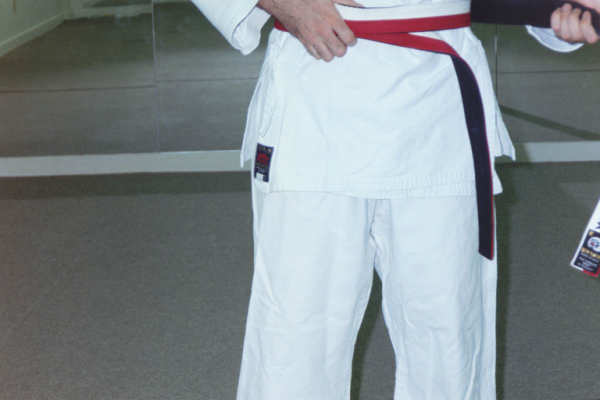
At this point, you can pull on the ends of the belt to tighten it until it is comfortable.
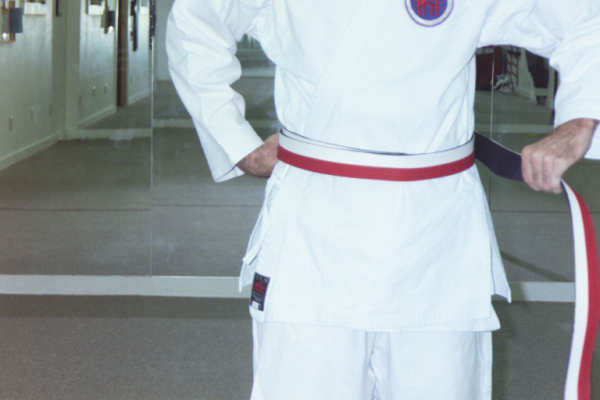
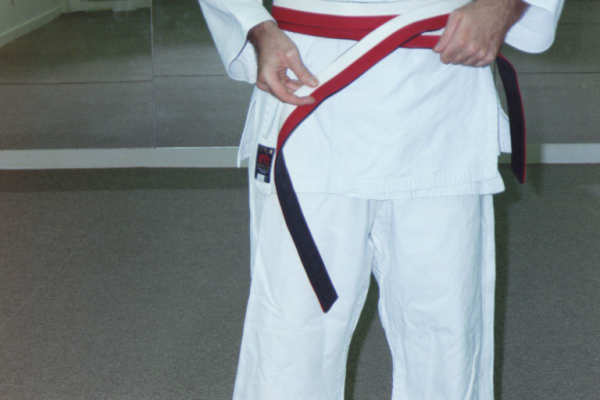
Step 5 – Take one end of the belt in each hand. (The side that comes out on top should be in your right hand.) Cross the right-hand end over the left, then bring it up through the hole.* Pull the knot tight.

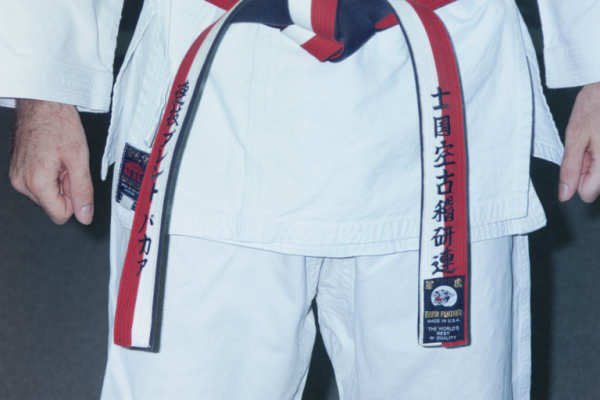
Tip: For these instructions, Renshi decided to use his teaching belt because of the different colors on each side. You can also watch for the tag to help you figure out which end is going where.